
Depois do meu rato decidir deixar de funcionar na superficie da minha secretária (juro que antigamente eram amigps, mas cortaram relações vá-se lá perceber porquê), comecei a usar o rato no cantinho do portátil, ao lado do rato do portátil.... Pois realmente não é lá grande solução- falta de espaço... Uma pessoa comprometeu-se a arranjar-me um tapete para o rato (sim, sim estou a falar contigo,
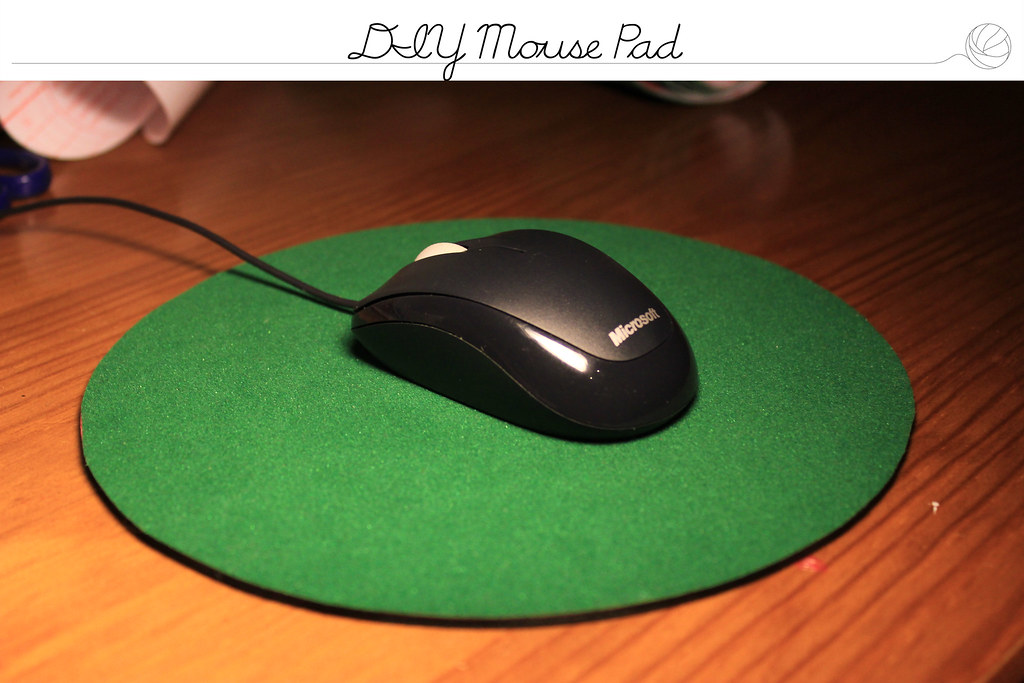
Encontrei estes tapetes de rato da publicidade velhos na garagem, são realmente pavorosos, mas depois do meu restyling, aquele que eu acolhi, para ser o novo amigo do meu rato, ficou muito melhor? Certo?
Se decidires fazer o mesmo, não tens de usar necessariamente um tapete velho, uma base de cortiça, das que se põe debaixo dos tacho também serve. Lembra-te de verificar se o teu rato aprova o material que escolhete para forrar. Depois manda fotos para o nosso mail para eu dar uma espreitadela se faz favor...
So for some reason my optical mouse didn't want to work on the surface of my desk anymore. I started using it on my laptop, you know that little corner on the side of laptop's mouse? Not all that spacious... Someone (you know who you are) said that would get me a mouse pad, but no mouse pad insight after some weeks. And so I decided to take matters into my on hands! Found this really ugly promotional mouse pad in the garage and gave them a restyle. Much better now right? If you decide to do the same first verify that your mouse works beautifully on the material you decide to cover the old mouse pad with. You may also use one of those things that are used to put under pans when you bring them to the table (this is what I am blabbing about).
Materiais:
Supplies:
-Tapede de rato antigo ou base de tachos;
-Old mouse pad or the thing you put under the pans when you put them on the table (I can't remmeber how it's called);
-Veludo autocolante;-Some velvet that sticks, the one you see in the pictures;
-Tesoura;
-Scissors;
-Lápis;
-Pencil;
-Posca verde.
-Green posca.


1º Passo: Colocar o tapede do rato antigo em cima do lado de papel do veludo e e contornar com o lápis.
1st Step: Place the old mouse pad on top of the paper side of the velevet and draw it.


2º Passo: Cortar o veludo por dentro da linha desenhada.
2nd Step: Cut the velvet. It's better to cut inside the line than out.


3º Passo: Descola uma das pontas e depois cola cuidadosamente o veludo no tapete.
3rd Step: Carefully remove some of the protecting paper from the velvet and start layering it on to the old mouse pad.


4º Passo: Corta o excesso cuidadosamente, não queres cortar o próprio tapete do rato.
4th Step: Trim the exceeding velvet.


5º Passo: Com a posca verde, do tom do veludo, pinta qualquer canto do tapete velho que tenha ficado à mostra e depois a lateral do tapete, para ficar com uns acabamentos super verdinhos.
5th Step: Paint any piece of your old mouse pad with your posca, it should be the same color as your velvet. Then paint the sides of your mouse pad, so that it looks extra green.


ANTES E DEPOIS
BEFORE AND AFTER


Cool idea and great blog!
ReplyDeleteThanks for the comment on Lookbook :)
x X
Great idea and great blog, I´ll follow
ReplyDeletexoxo
http://besosmulticolor.blogspot.com/
Thanks for your comment!<3
ReplyDeleteI'm following you back!<3